How to use Gilded Leafing
Chocolate Covered Strawberries
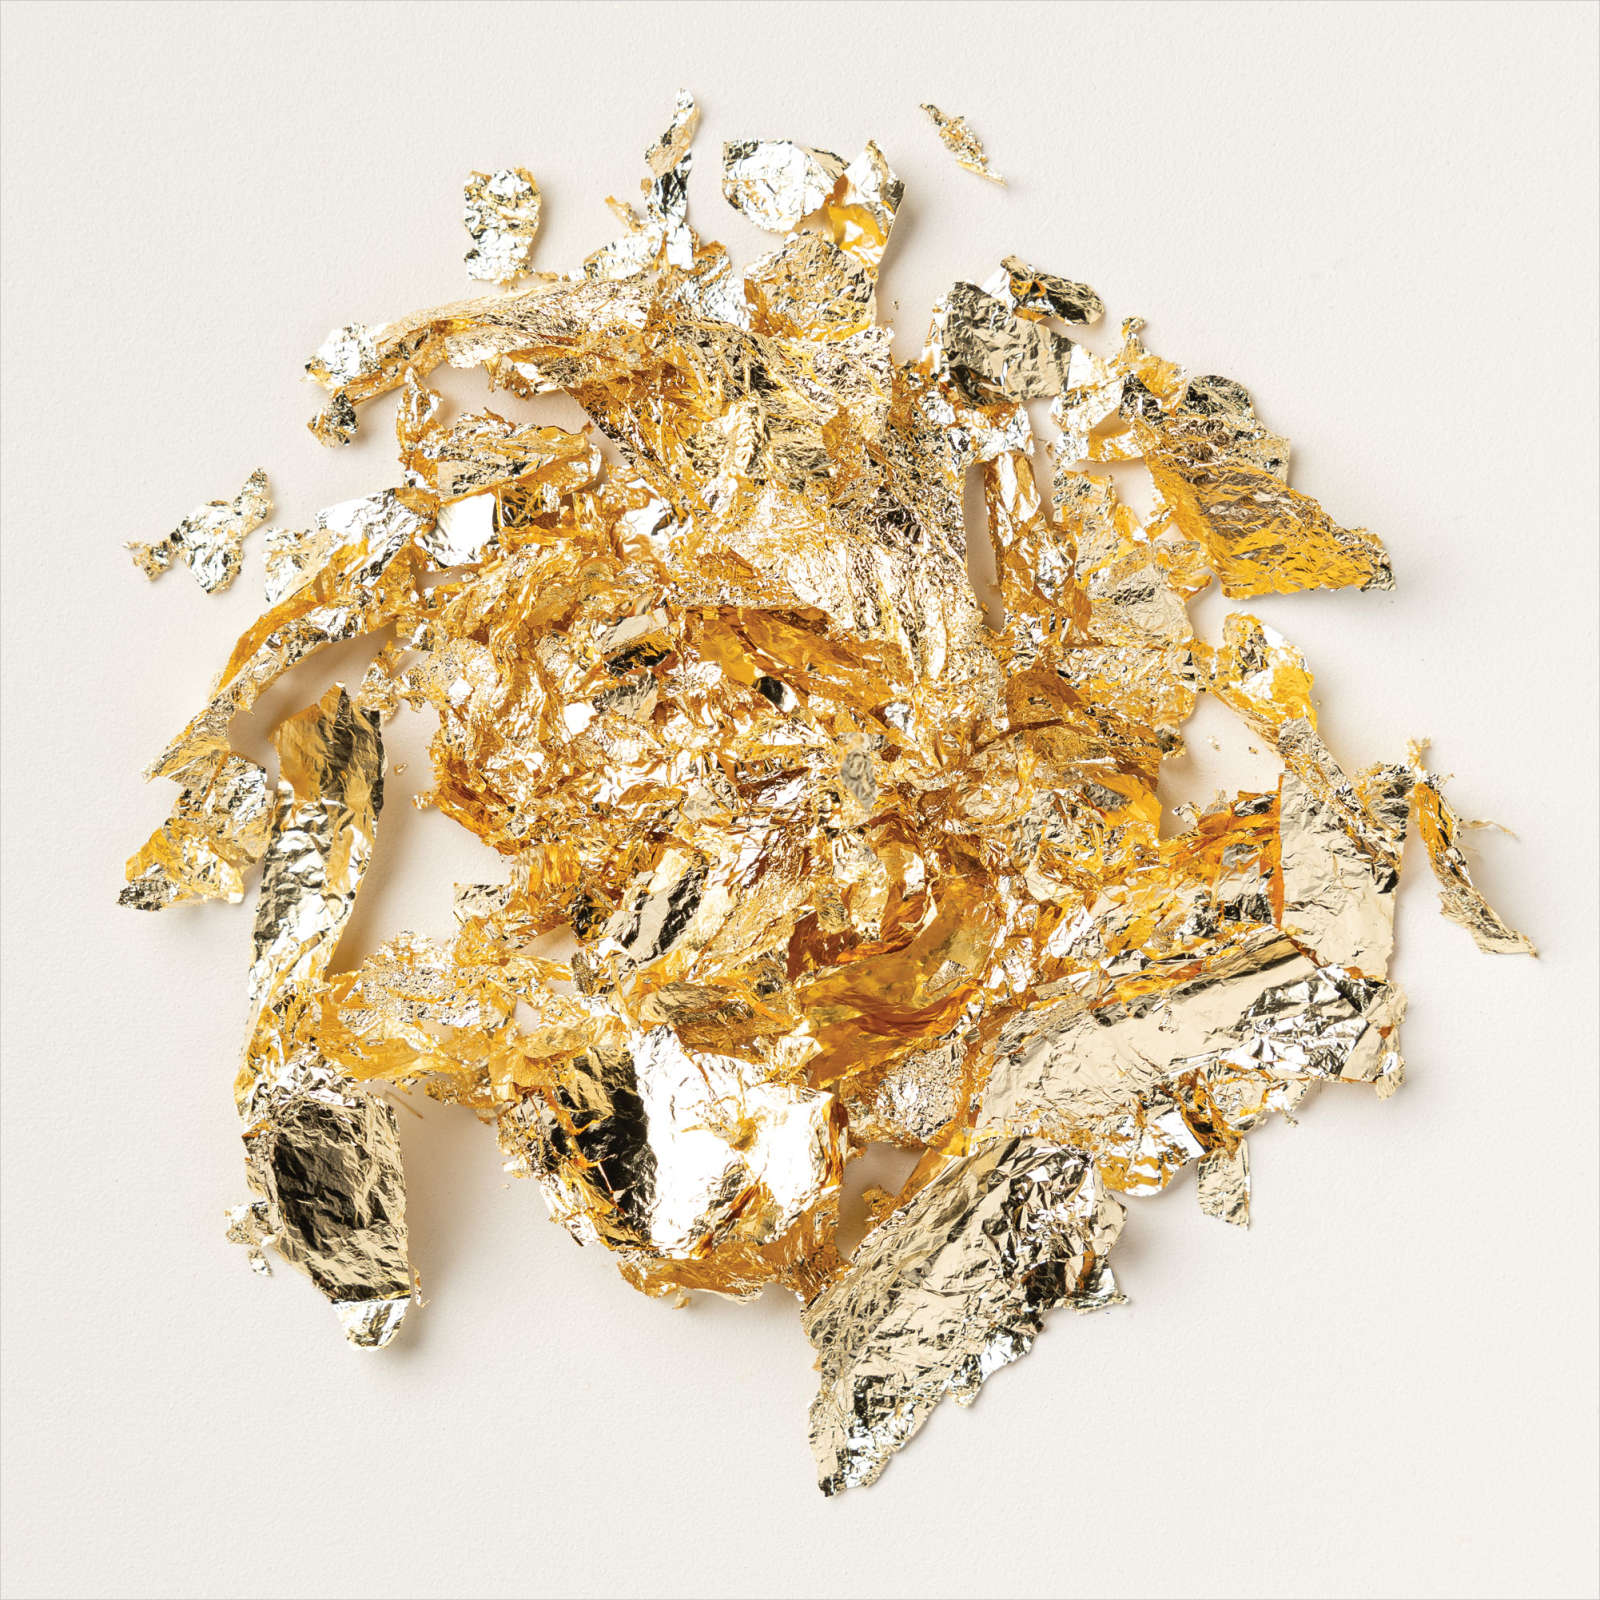
Gilded Leafing from Stampin’ Up! adds a touch of elegance and shimmer to your paper crafting projects.
(You can see more of my Gilded Leafing projects HERE)
For this card, I added it to my chocolate-covered strawberries for a card, perfect for any occasion.

Here’s How:
- Two-step stamp the strawberry on a piece of scrap Basic White card stock. First, stamp the solid image in a lighter color. Then stamp the detailed image in a darker color.
- Punch using Strawberry Builder Punch.
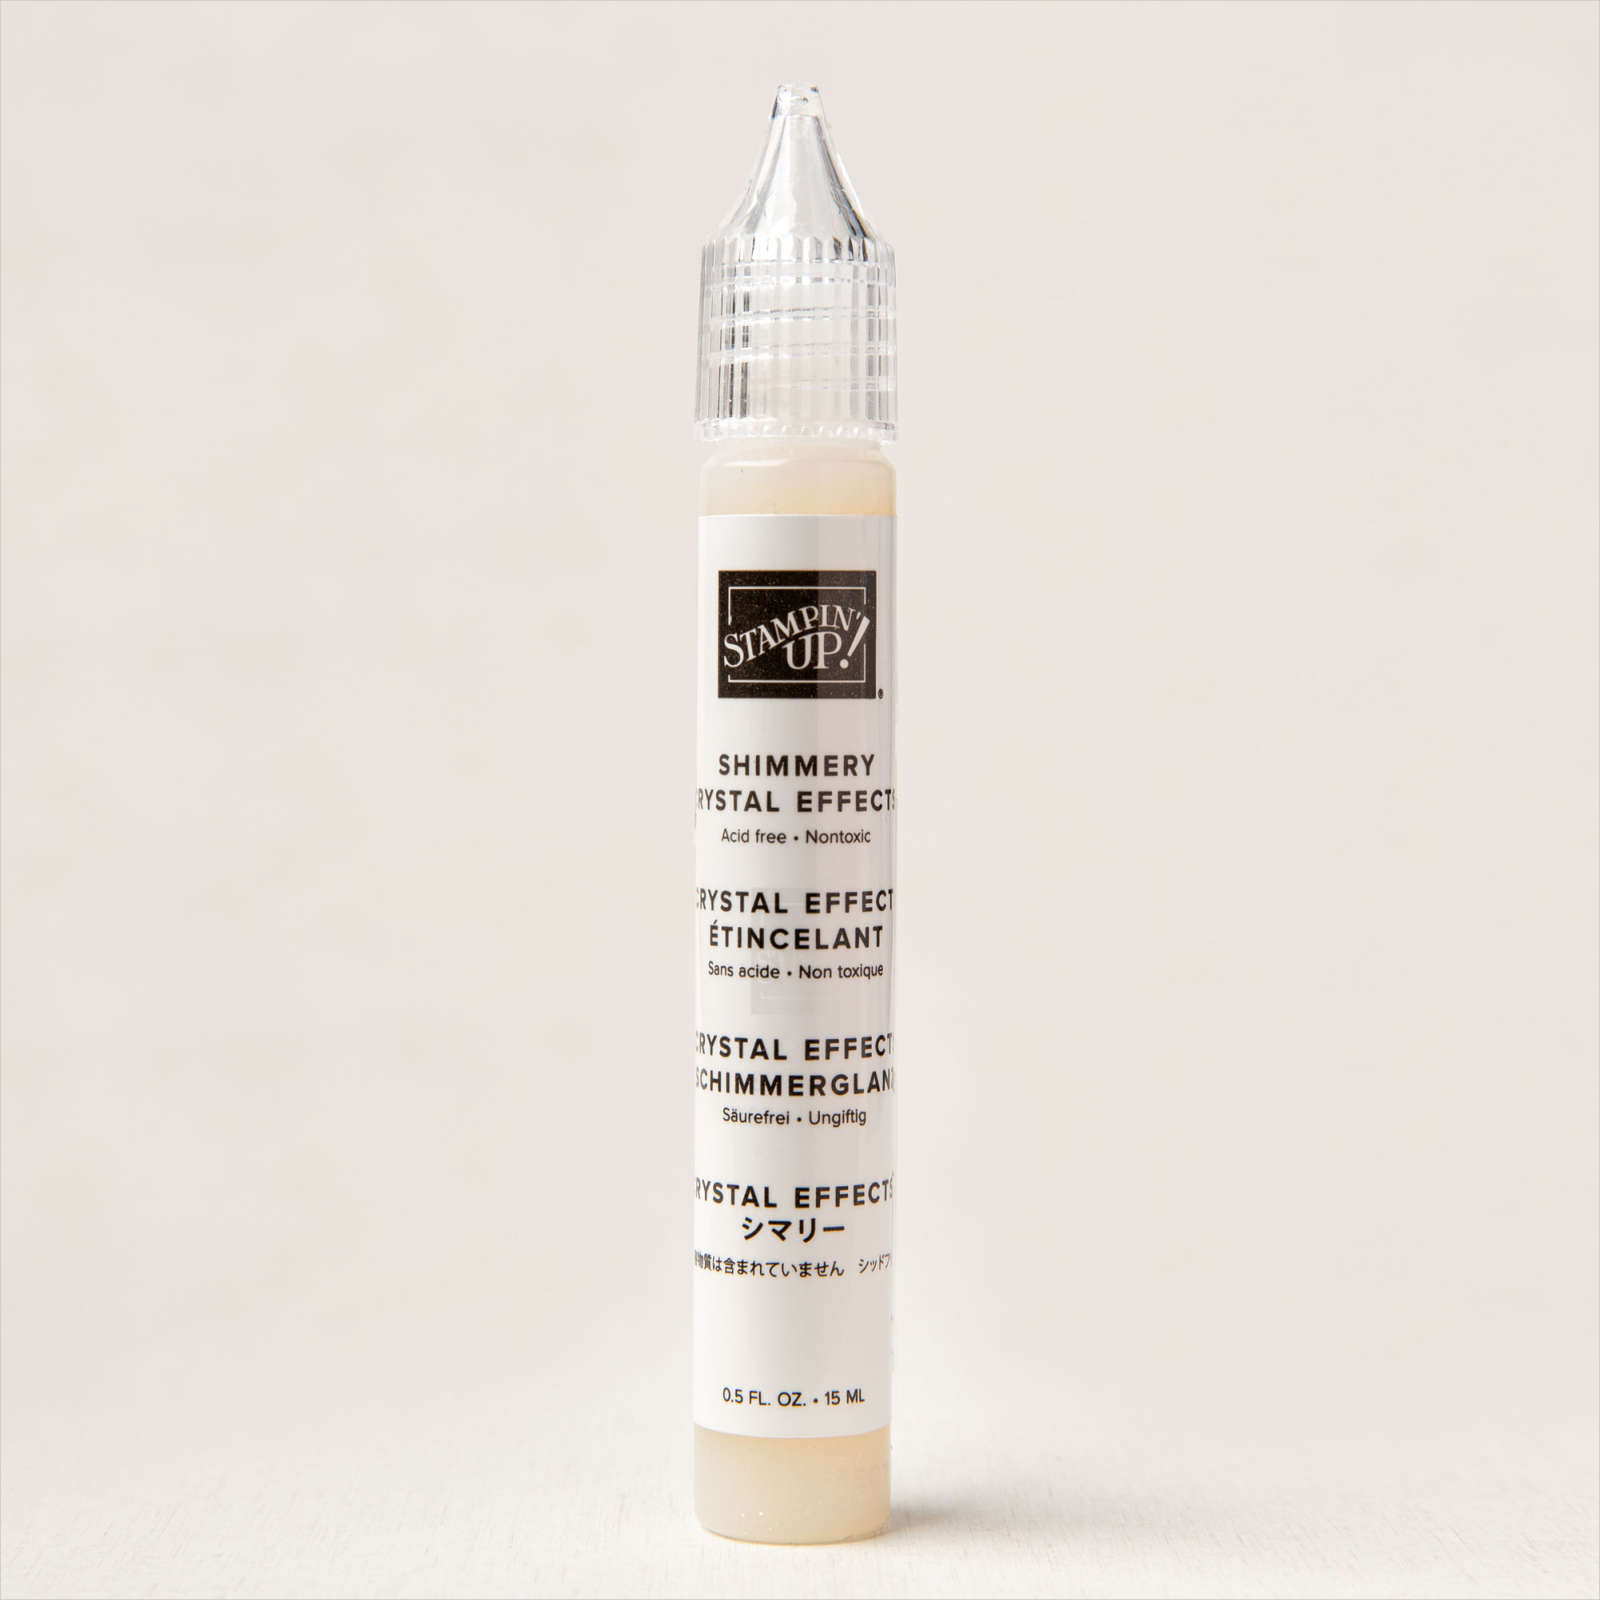
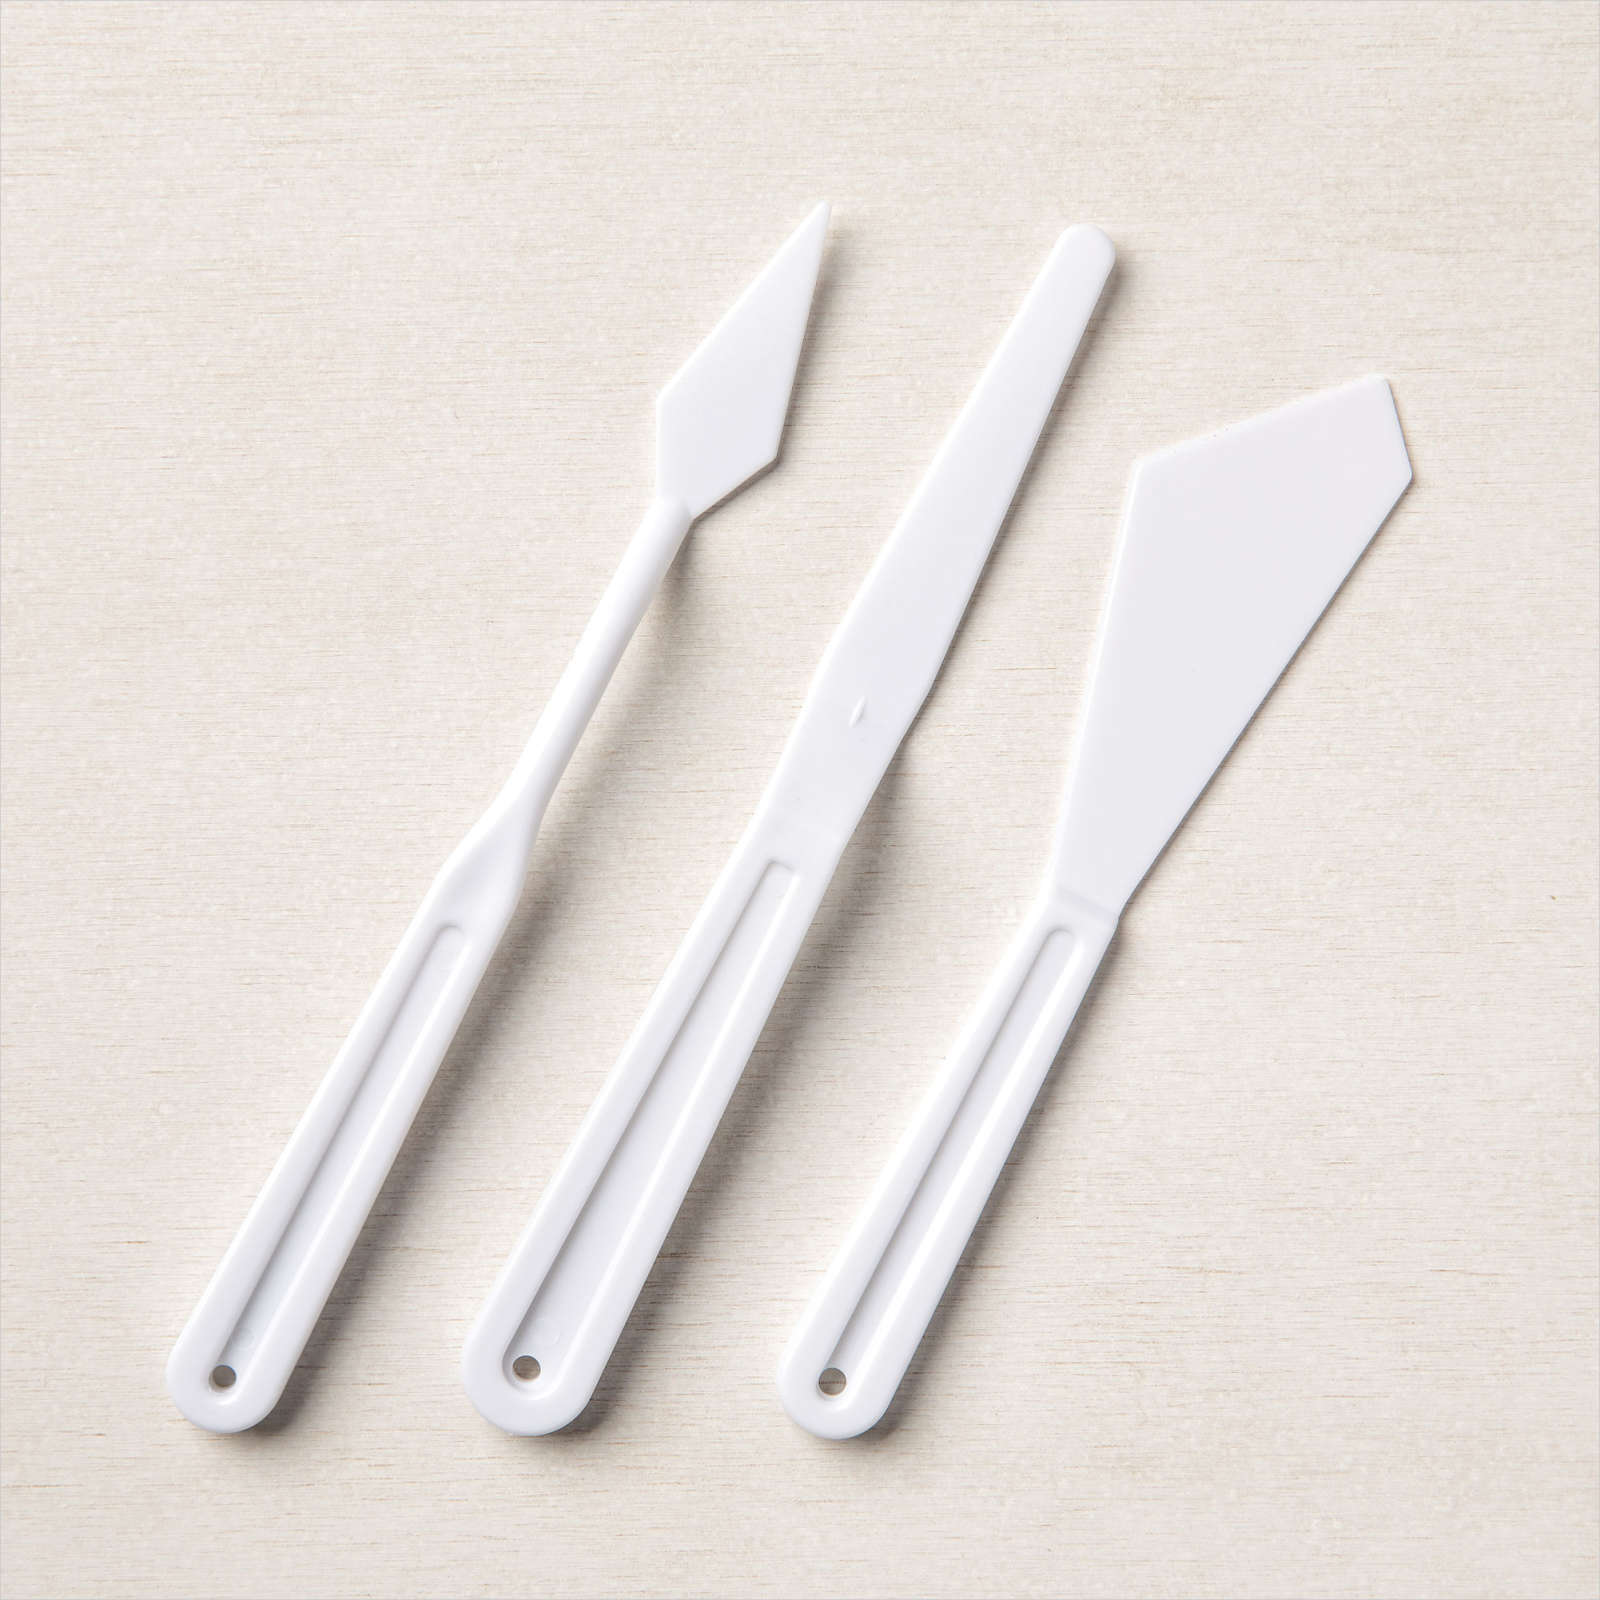
- To create the chocolate, mix Crystal Effects or Embossing Paste with a small drop of Early Espresso ink using a Palette Knife. Add to the strawberries using the Palette Knife.
- For a touch of shimmer add small pieces of the Gilded Leafing while the mixture is still wet. Set aside to dry.
- Stamp strawberry stems on Old Olive card stock using Mossy Meadow ink. Punch using Strawberry Builder Punch.
- Add a small amount of clear Crystal Effects or Embossing Paste to the edges using the Palette Knife. Add little pieces of Gilded Leaving. Set aside to dry.
- Die-cut labels out of Basic White and Early Espresso card stock. Stamp greeting using Early Espresso ink. Layer labels.
- Attach Simply Marbelous 6″x6″ Designer Series Paper to Early Espresso mat. Adhere to Basic White card base, and attach labels to card front.
- Add stems to strawberries. Attach strawberries to card front using Mini Dimensionals to pop them up. Add red rhinestones to complete.
Be sure to watch this short how-to video Here

Order Online 24/7: